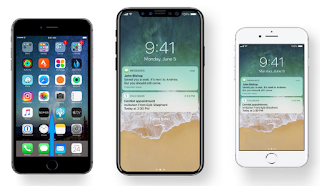
Showing posts with label iPhone Guide. Show all posts

iPhone Time Settings and Alarm Settings

iPhone Time Settings
iPhone Time Settings and Alarm Settings - This iPhone guide will help to set your iPhone time settings and set the alarm settings on your iPhone. The date and time are usually set for you based on your location, take a look at the Lock screen to see if they’re correct.

iPhone Time Settings and Alarm Settings

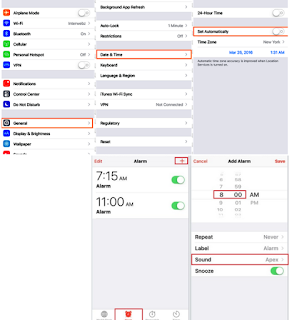
Set whether iPhone updates the date and time automatically. Go to Settings > General > Date & Time, then turn Set Automatically on or off. If you set iPhone to update the time automatically, it gets the correct time over the cellular network and updates it for the time zone you’re in. Some carriers don’t support network time, so in some areas iPhone may not be able to automatically determine the local time.

iPhone Time Settings
iPhone Time Settings and Alarm Settings

Follow this iPhone Operating Instructions to setting iPhone time:
  1. From the Home screen, navigate: Settings > General > Date & Time.
  2. Tap the 24-Hour Time switch to turn on Switch On (in the green position) or off Switch Off.
  3. Tap the Set Automatically switch to turn on or off.
  4. If "Set Automatically" is turned off, tap Time Zone.
  5. Enter then tap the city, state or country.
  6. Tap the Date & Time field then set the date and time.

Set the date and time manually.
  • Go to Settings > General > Date & Time, then turn off

Set iPhone Time Automatically.
Set whether iPhone shows 24-hour time or 12-hour time.
  • Go to Settings > General > Date & Time, then turn 24-Hour Time on or off. (24-Hour Time may not be available in all areas.)

How To Change Alarm Sound iPhone?
iPhone Time Settings and Alarm Settings

Alarms on iPhone will help you to wake up early so you never late.
iPhone Alarm Settings:
  1. Tap Alarm, then tap Set your wake-up time and other options, then give the alarm a name (like “Good morning”).
  2. Tap to change options or delete an alarm.
  3. Turn saved

Turn iPhone Alarms on or off.

No wasting time! You can also use the stopwatch to keep time, record lap times, or set a timer to
alert you when time’s up.
Want to fall asleep to music or a podcast? Tap Timer, tap When Timer Ends, then choose Stop
Playing at the bottom.

How to set a custom alarm sound on your iPhone?
  1. Launch the Clock app from your Home screen.
  2. Tap on the Alarm tab.
  3. Tap the Edit button.
  4. Tap on the Alarm you want to sound different.
  5. Tap on the sound tab.
  6. Scroll up to the top of the list.
  7. Tap on the Pick a song tab.

Get quick access to clock features. Swipe up from the bottom edge of the screen to open Control Center, then tap . You can access Timer from Control Center even when iPhone is locked. You can also navigate to the other clock features.

Use Siri. Say something like:
  • “Set the timer for 3 minutes”
  • “Wake me up tomorrow at 7 a.m.”
  • “What alarms do I have set?”

iPhone Privacy Settings

Privacy settings let you see and control which apps and system services have access to Location Services, and to contacts, calendars, reminders, and photos. Location Services lets location-based apps such as Reminders, Maps, and Camera gather and use data indicating your location. Your approximate location is determined using available information from cellular network data, local Wi-Fi networks (if you have Wi-Fi turned on), and GPS (may not be available in all areas). The location data collected by Apple isn’t collected in a form that personally identifies you. When an app is using Location Services, appears in the status bar.

Turn Location Services on or off.

Go to Settings > Privacy > Location Services. You can turn it off for some or for all apps and services. If you turn off Location Services, you’re prompted to turn it on again the next time an app or service tries to use it.

Turn Location Services off for system services. Several system services, such as compass calibration and location-based ads, use Location Services. To see their status, turn them on or off, or show in the status bar when these services use your location, go to Settings > Privacy > Location Services >
System Services.

Turn off access to private information
Go to Settings > Privacy. You can see which apps and features have requested and been granted access to the following information:
  1. Contacts
  2. Calendar
  3. Reminders
  4. Photos
  5. Bluetooth Sharing
  6. Microphone
  7. Camera
  8. HomeKit
  9. Health
  10. Motion Activity
  11. Twitter
  12. Facebook
You can turn off each app’s access to each category of information. Review the terms and privacy policy for each third-party app to understand how it uses the data it’s requesting

iPhone Cellular settings

Use Cellular settings to turn cellular data and roaming on or off, set which apps and services use cellular data, see call time and cellular data usage, and set other cellular options.
If iPhone is connected to the Internet via the cellular data network, the LTE, 4G, 3G, E, or GPRS icon appears in the status bar.

iPhone Networks

iPhone networks LTE, 4G, and 3G service on GSM cellular networks support simultaneous voice and data communications. For all other cellular connections, you can’t use Internet services while you’re talking on the phone unless iPhone also has a Wi-Fi connection to the Internet. Depending on your network connection, you may not be able to receive calls while iPhone transfers data over the cellular network, when downloading a webpage, for example.
  1. iPhone GSM networks: On an EDGE or GPRS connection, incoming calls may go directly to voicemail during data transfers. For incoming calls that you answer, data transfers are paused.
  2. iPhone CDMA networks: On EV-DO connections, data transfers are paused when you answer incoming calls. On 1xRTT connections, incoming calls may go directly to voicemail during data transfers. For incoming calls that you answer, data transfers are paused.

Data transfer resumes when you end the call.
If Cellular Data is off, all data services use only Wi-Fi including email, web browsing, push notifications, and other services. If Cellular Data is on, carrier charges may apply. For example, using certain features and services that transfer data, such as Siri and Messages, could result in charges to your data plan.

Turn Cellular Data on or off. Go to Settings > Cellular, then tap Cellular Data.
The following iPhone settings options may also be available:
  1. Turn Voice Roaming on or off (CDMA): Turn Voice Roaming off to avoid charges from using other carrier’s networks. When your carrier’s network isn’t available, iPhone won’t have cellular (data or voice) service.
  2. Turn Data Roaming on or off: Data Roaming permits Internet access over a cellular data network when you’re in an area not covered by your carrier’s network. When you’re traveling, you can turn off Data Roaming to avoid roaming charges. See Phone settings on page 57.
  3. Enable or disable 4G/LTE (varies by carrier): Using 4G or LTE loads Internet data faster in some cases, but may decrease battery performance. If you’re making a lot of phone calls, you may want to turn 4G/LTE off to extend battery life. This option is not available in all areas. On iPhone 6 and iPhone 6 Plus, there are options for turning off 4G/LTE, selecting Voice & Data (VoLTE), or Data Only.
  4. Voice & Data (some carriers): Choose LTE to load data faster. Choose slower speeds to increase battery life.
  5. Set up Personal Hotspot: Personal Hotspot shares the Internet connection on iPhone with your computer and other iOS devices.
Share This:    Facebook Twitter Google+ Stumble Digg

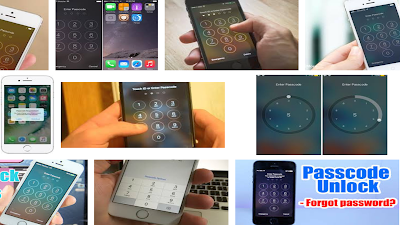
iPhone Passcode Setup

iPhone Passcode
iPhone Passcode Setup - Learn to set up iPhone passcode, for better security, you can set a passcode that must be entered each time you turn on or wake up iPhone.

iPhone Passcode Setup

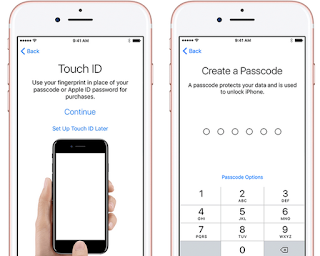
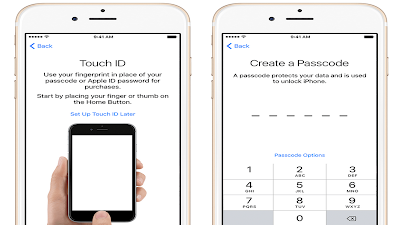
Turn on iPhone, then follow the Setup Assistant on your new iPhone model. The Setup Assistant steps you through the process, including:
  1. Connecting to a Wi-Fi network
  2. Signing in with or creating a free Apple ID (needed for many features, including iCloud, FaceTime, the iTunes Store, the App Store, and more)
  3. Entering a passcode
  4. Setting up iCloud and iCloud Keychain
  5. Turning on recommended features such as Location Services
  6. Adding a credit or debit card to Passbook to use with Apple Pay (iPhone 6 or iPhone 6 Plus)
  7. Activating iPhone with your carrier
You can also restore iPhone from an iCloud or iTunes backup during setup

iPhone Passcode
iPhone Passcode Setup

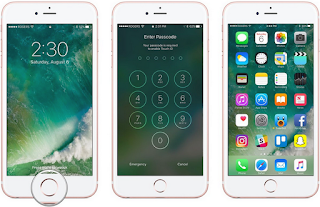
The iPhone passcode need when you turn iPhone on and unlock it the first time. You’ll also be asked for your Apple ID password for the first purchase you make in the iTunes Store, App Store, or iBooks Store.

Use the Touch ID sensor to make a payment in the iTunes Store, App Store, or iBooks Store. When purchasing from the iTunes Store, App Store, or iBooks Store, follow the prompts to enable purchases with your fingerprint. Or go to Settings > Touch ID & Passcode, then turn on iTunes & App Store.

Use Touch ID for Apple Pay. (iPhone 11 or iPhone 11 Pro Max) Go to Settings > Touch ID & Passcode to ensure that Apple Pay is enabled with your Touch ID.

Delete a fingerprint. Tap the fingerprint, then tap Delete Fingerprint. If you have more than one fingerprint, place a finger on the Home button to find out which fingerprint it is.
Name a fingerprint. Tap the fingerprint, then enter a name, such as Thumb.

iPhone Security

Security features help protect the information on your iPhone from being accessed by others.
Use a passcode with data protection For better security, you can set a passcode that must be entered each time you turn on or wake up iPhone.

How to Set Up iPhone passcode?
iPhone Passcode Set Up

Here the iPhone guide to setup iPhone passcode:

  • Go to Settings > Touch ID & Passcode (iPhone models with Touch ID) or
  • Go to Settings > Passcode (other models), then set a 4-digit passcode.
Setting a passcode turns on data protection, using your passcode as a key to encrypt Mail messages and attachments stored on iPhone, using 256-bit AES encryption. (Other apps may also use data protection.)

How do you unlock a disabled iPhone?
Unlock Disabled iPhone/iPad/iPod without iTunes through Find My iPhone
  1. Go to icloud.com, find from another device or computer.
  2. If prompted, sign in with iCloud Apple ID.
  3. Click All Devices at the top browse window.
  4. Select device which you want to erase.

How do I get into my iPhone if its disabled?
The device should turn on, then:
  • Continue holding the Home button until you see the Connect to iTunes screen. iTunes will alert you that it has detected a device in recovery mode. Click OK, and then restore the device.
How do I unlock iPhone 5 passcode?
You can reset an iPhone without the password by follow this iPhone manual insctructions:
  1. Press and hold the Home button (at the bottom of iPhone) and the Sleep/Wake button (on top of the iPhone) simultaneously.
  2. Hold both buttons until the iPhone shuts off and begins to restart.
  3. Let it go when you see the Apple logo appear on screen.
Congratulations. You've just performed a hard reset and do reset an iPhone without the password.
This tutorial also resolve:
  1. How to unlock iphone passcode without computer
  2. How to unlock iphone XR passcode without itunes
  3. Forgot iphone passcode without restore
  4. Forgot iphone 11 passcode
  5. I forgot my iphone passcode
  6. Hack iphone passcode
  7. How to unlock a disabled iphone
Increase iPhone Security

Turn off Simple Passcode and use a longer passcode. To enter a passcode that’s a combination of numbers and letters, you use the keyboard. If you prefer to unlock iPhone using the numeric keypad, set up a longer passcode using numbers only.
Add fingerprints and set options for the Touch ID sensor. (iPhone models with Touch ID) Go to Settings > Touch ID & Passcode.
Allow access to features when iPhone is locked. Go to Settings > Touch ID & Passcode (iPhone models with Touch ID) or Settings > Passcode (other models). Optional features include:
  1. Today
  2. Notifications View
  3. Siri
  4. Passbook
  5. Reply with Message
Allow access to Control Center when iPhone is locked. Go to Settings > Control Center.

Erase data after ten failed passcode attempts

Go to Settings > Touch ID & Passcode (iPhone models with Touch ID) or Settings > Passcode (other models), then tap Erase Data. After ten failed passcode attempts, all settings are reset, and all your information and media are erased by removing the encryption key to the data.

If you forget your passcode, you must restore the iPhone software.
On iPhone models with Touch ID, you can unlock iPhone by placing a finger on the Home button. Touch ID also lets you:
  1. Use your Apple ID password to make purchases in the iTunes Store, App Store, or iBooks Store
  2. Present your credit card or debit card when making a purchase in a store that offers Apple Pay as a method of payment
  3. Provide debit and credit card info, billing and shipping addresses, and contact info when paying in an app that offers Apple Pay as a method of payment

Set up the Touch ID sensor.
Go to Settings > Touch ID & Passcode. Set whether you want to use a fingerprint to unlock iPhone, and to make purchases. Tap Add a Fingerprint, then follow the onscreen instructions. You can add more than one fingerprint (your thumb and forefinger, for example, or one for your spouse).

iCloud Keychain
iCloud Keychain keeps your Safari website user names and passwords, credit card information, and Wi-Fi network information up to date. iCloud Keychain works on all your approved devices (iOS 7 or later) and Mac computers (OS X Mavericks or later).

iCloud Keychain works with Safari Password Generator and AutoFill. When you’re setting up a new account, Safari Password Generator suggests unique, hard-to-guess passwords. You can use AutoFill to have iPhone enter your user name and password info, making login easy. Some websites do not support AutoFill. iCloud Keychain is secured with 256-bit AES encryption during storage and transmission, and cannot be read by Apple.

Set up iCloud Keychain
Go to Settings > iCloud > Keychain. Turn on iCloud Keychain, then follow the onscreen instructions. If you set up iCloud Keychain on other devices, you need to approve use of iCloud Keychain from one of those devices, or use your iCloud Security Code.
If you forget your iCloud Security Code, you have to start over and set up your iCloud Keychain again.

Set up AutoFill. Go to Settings > Safari > Passwords & AutoFill. Make sure Names and Passwords, and Credit Cards, are turned on (they’re on by default). To add credit card info, tap Saved Credit Cards.
The security code for your credit card is not saved—you have to enter that manually.
To automatically fill in names, passwords, or credit card info on sites that support it, tap a text field, then tap AutoFill.
To protect your personal information, set a passcode if you turn on iCloud Keychain and AutoFill.

Limit Ad Tracking
Restrict or reset Ad Tracking. Go to Settings > Privacy > Advertising. Turn on Limit Ad Tracking to prevent apps from accessing your iPhone advertising identifier. For more information, tap About Advertising & Privacy.

Find My iPhone

Find My iPhone can help you locate and secure your iPhone using the free Find My iPhone app (available in the App Store) on another iPhone, iPad, or iPod touch, or using a Mac or PC web browser signed in to www.icloud.com/find. Find My iPhone includes Activation Lock, which is designed to prevent anyone else from using your iPhone if you ever lose it. Your Apple ID and password are required to turn off Find My iPhone or to erase and reactivate your iPhone.
Turn on Find My iPhone. Go to Settings > iCloud > Find My iPhone.

To use Find My iPhone features, Find My iPhone must be turned on before your iPhone is lost. iPhone must be able to connect to the Internet for you to locate and secure the device. iPhone sends its last location prior to the battery running out when Send Last Location in Settings is turned on.

Use Find My iPhone. Open the Find My iPhone app on an iOS device, or go to www.icloud.com/find on your computer. Sign in, then select your device.
  1. Play Sound: Play a sound at full volume for two minutes, even if the ringer is set to silent.
  2. Lost Mode: Immediately lock your missing iPhone with a passcode and send it a message displaying a contact number. iPhone tracks and reports its location, so you can see where it’s been when you check the Find My iPhone app. Lost Mode also suspends the use of your credit and debit cards used for Apple Pay (iPhone 11 and iPhone 11 Pr0; iPhone 11 Pro Max and iPhone XR).
  3. Erase iPhone: Protect your privacy by erasing all the information and media on your iPhone and restoring it to its original factory settings. Erase iPhone also removes the ability to make payments using your credit and debit cards used for Apple Pay (iPhone 11 and iPhone 11 Pro; iPhone X and iPhone 11 Pro Max).
Selling iPhone / Upgrade iPhone
Before selling, upgrade iPhone or giving away your iPhone, you should erase it completely to remove all of your personal data and turn off Find My iPhone to ensure the next owner can activate and
use the device normally. Go to Settings > General > Reset > Erase All Content and Settings.

Siri settings
To set options for Siri, go to Settings > General > Siri. Options include:
  1. Turning Siri on or off
  2. Turning Allow “Hey Siri” on or off
  3. Language
  4. Voice gender (may not be available in all areas)
  5. Voice feedback
  6. My Info card
Prevent access to Siri when iPhone is locked. Go to Settings > Touch ID & Passcode (iPhone models with Touch ID) or Settings > Passcode (other models). You can also disable Siri by turning on restrictions.

Emergency calls
Make an emergency call when iPhone is locked. On the Enter Passcode screen, tap Emergency Call (to dial 911 in the U.S., for example).You can use iPhone to make an emergency call in many locations, provided that cellular service is available, but you should not rely on it for emergencies. Some cellular networks may not accept an emergency call from iPhone if iPhone is not activated, if iPhone is not compatible with or configured to operate on a particular cellular network, or (when applicable) if iPhone does not have a SIM card or if the SIM card is PIN-locked.
In the U.S., location information (if available) is provided to emergency service providers when you dial 911. Please review your carrier’s emergency calling information to understand the limits of emergency calling over Wi-Fi.

Change the language for Voice Control. By default, Voice Control expects you to speak voice
commands in the language that’s set for iPhone (in Settings > General > International >
Language).

To use Voice Control in another language or dialect, go to Settings > General >
International > Voice Control.

Voice Control for the Music app is always on, but you can keep Voice Control from dialing
when iPhone is locked. Go to Settings > Touch ID & Passcode (iPhone models with Touch ID) or
Settings > Passcode (other models), then turn off Voice Dial.

Choose whether to show Today and Notifications View on a locked screen. Go to Settings > Touch ID & Passcode (iPhone models with Touch ID) or Settings > Passcode (other models), then choose whether to allow access when locked. Close Notification Center. Swipe up, or press the Home button.

Restrictions
You can set restrictions for some apps, and for purchased content. For example, parents can restrict explicit music from appearing in playlists, or disallow changes to certain settings. Use restrictions to prevent the use of certain apps, the installation of new apps, or changes to accounts or the volume limit.

Turn on restrictions. Go to Settings > General > Restrictions, then tap Enable Restrictions. You’ll be asked to define a restrictions passcode that’s necessary to change the settings you make. This can be different from the passcode for unlocking iPhone.
Share This:    Facebook Twitter Google+ Stumble Digg

Manage Content on iOS 11

Manage iOS 11
Manage Content on iOS 11 - You can transfer information and files between your old iOS devices and computers, using iCloud or iTunes into new iOS 11 device. Learn here to connect iOS device and manage your content.

Manage Content on iOS 11

After turn on iPhone, and Setup new iPhone using the new automatic setup assistant on iOS 11, the Setup Assistant steps you through the process manage iOS 11, including:
  1. Connecting to a Wi-Fi network
  2. Signing in with or creating a free Apple ID (needed for many features, including iCloud, FaceTime, the iTunes Store, the App Store, and more)
  3. Entering a passcode
  4. Setting up iCloud and iCloud Keychain
  5. Turning on recommended features such as Location Services
  6. Adding a credit or debit card to Passbook to use with Apple Pay (iPhone 8 or iPhone 8 Plus)
  7. Activating iPhone with your carrieriCloud stores your photos and videos, documents, music, calendars, contacts, and more.
You can use iCloud or iTunes, or both, depending on your needs. For example, you can use iCloud to automatically keep your contacts and calendars up to date on all your devices, and use iTunes to sync music from your computer to iPhone. It all gets pushed wirelessly to your other iOS devices and computers, keeping everything up to date using iCloud. iTunes syncs music, videos, photos, and more between your computer and iPhone. Changes you make on one device are copied to the other when you sync. To avoid duplicates, keep contacts, calendars, and notes in sync using iCloud or iTunes, but not both.

You can also manually manage content from iTunes, in the device’s Summary pane. This lets you
add songs and videos, by choosing a song, video, or playlist from your iTunes library and then
dragging it to your iPhone in iTunes. This is useful if your iTunes library contains more items than
can fit on your device. If you use iTunes Match, you can manually manage only video.

Connect iPhone to Computer

Connecting iPhone iOS 11 to your computer than you can sync content from your computer using iTunes.

Manual Connect iPhone to Computer :
  • An Internet connection for your computer (broadband is recommended)
  • A Mac or a PC with a USB 2.0 or 3.0 port, and one of the following operating systems:
    • OS X version 10.6.8 or later
    • Windows 10, Windows 8, Windows 7, or Windows XP Home or Professional with Service Pack 3 or later
Connect iPhone to your computer. Use the included Lightning to USB Cable or the 30-pin to
USB Cable.

Sync with iTunes 11

iOS 11 Syncing with iTunes copies information from your computer to iPhone, and vice versa. You can sync by connecting iPhone to your computer, or you can set up iTunes to sync wirelessly with
Wi-Fi. You can set iTunes to sync music, videos, apps, photos, and more.

iTunes 11 Tutorial
  1. Open iTunes on your computer, choose Help > iTunes Help,
  2. Then select Sync your iPod, iPhone, or iPad.
Download iTunes 11 an the latest available at www.itunes.com/download/.

Set up iOS 11

Set up iOS 11 and wireless syncing. Connect iPhone to your computer. In iTunes on your computer, select your iPhone, click Summary, then select Sync with this iPhone over Wi-Fi. If Wi-Fi syncing is turned on, iPhone syncs when it’s connected to a power source, both iPhone and your computer are on and connected to the same wireless network, and iTunes is open on your computer.

iOS 11 Tips

Connect iPhone to your computer, select it in iTunes, then set options in the different panes.
  1. If iPhone doesn’t appear in iTunes, make sure you’re using the latest version of iTunes, check
  2. that the included cable is correctly connected, then try restarting your computer.
  3. In the Summary pane, you can set iTunes to automatically sync iPhone when it’s attached to your computer. To temporarily prevent syncing when you attach the device, hold down Command and Option (Mac) or Shift and Control (PC) until you see iPhone appear in the iTunes window.
  4. In the Summary pane, select “Encrypt iPhone backup” if you want to encrypt the information stored on your computer when iTunes makes a backup. Encrypted backups are indicated by a lock icon , and a password is required to restore the backup. If you don’t select this option, other passwords (such as those for mail accounts) aren’t included in the backup and you’ll have to reenter them if you use the backup to restore iPhone.
  5. In the Music pane, you can sync music using your playlists.
  6. In the Photos pane, you can sync photos and videos from a supported app or folder on your computer.
  7. If you use iCloud to store your contacts, calendars, and bookmarks, don’t also sync them to iPhone using iTunes.
  8. If you turn on iCloud Photo Library, you can’t use iTunes to sync photos and videos to iPhone.

How To Change The Name On An iPhone

The name of your iPhone is used by both iTunes and iCloud.

Manual Change the name on iPhone:
  • Go to Settings > General > About > Name.
Learn more: How to Set Up iPhone X
Get iPhone 8 Ultimate Guide

View this iPhone User Guide

You can view the iPhone User Guide on iPhone in Safari, and in the iBooks app.iPhone Guide view the iPhone user guide:
  1. View the user guide in Safari. Tap , then tap the iPhone User Guide bookmark. (If you don’t see a bookmark, go to help.apple.com/iphone/.)
  2. View the user guide in a different language: Tap Change Language at the bottom of the home page.
  3. View the user guide in iBooks. Open iBooks, then search for “iPhone user” in the iBooks Store.
Add an icon for the user guide to the Home screen: Tap , then tap Add to Home Screen.

Tips for using iOS 11

The Tips app helps you get the most from iPhone. Get Tips. Open the Tips app. New tips are added weekly. Get notified when new tips arrive.

iOS 11 online Tips
  • Go to Settings > Notifications > Tips.
    Share This:    Facebook Twitter Google+ Stumble Digg

    iOS 11 iPhone 8 Ulimate Guide

    iPhone 8 Ulimate Guide
    iOS 11 iPhone 8 Ulimate Guide - Update iOS 11 iPhone 8 Settings, another ways update iOS using iTunes. Learn how to iOS 11 in your iPhone 8 / iPhone 8 Plus and ultimate guide how to use iMessage Bubble.

    iOS 11 iPhone 8 Ulimate Guide


    iOS 11 conveys intense and new elements to iPhone 8 bolster multitasking with another adaptable Dock that gives fast access to much of the time utilized applications and reports from any iPhone 8 screen.

    iOS 11

    iOS 11 discharge date with many elements to iPhone and iPad with another stage in virtual substance turn out to be more savvy. Extra iOS 11 highlights incorporate the capacity to pay companions utilizing Apple Pay, Do Not Disturb while driving much more knowledge and another voice for Siri and new expert abilities to Photos and Camera. iOS 11was declared on June 5, 2017, the discharge date in 2017.

    iOS 11 iPhone 8
    iOS 11 iPhone 8

    You can refresh iOS 11 in iPhone Settings by read this manual:

    On your (iPhone 8, iPhone 8 Plus or later), go to Settings > General > Software Update. at that point checks for accessible programming refreshes.

    Introduce iOS 11 iPhone 8

    On the off chance that a message says that a refresh is accessible, tap Install Now to introduce iOS 11 likewise take after these means iPhone 8 Manual :

    Connect your gadget to power and associate with the Internet with Wi-Fi.

    Tap Settings > General > Software Update.

    Tap Download and Install. On the off chance that a message asks to briefly expel applications since iOS needs more space for the refresh, tap Continue or Cancel. Afterward, iOS will reinstall applications that it evacuated.

    To refresh now, tap Install. Or, then again you can tap Later and pick Install Tonight or Remind Me Later. On the off chance that you tap Install Tonight, simply connect your iOS gadget to control before you go to rest. Your gadget will refresh naturally overnight.

    Enter your password.

    Mistake when refreshing iOS 11

    On the off chance that you require more space for a remote refresh, you can refresh utilizing iTunes or erase content physically from your gadget. Regardless of whether you utilize iTunes or refresh remotely, you'll have a similar measure of free space on your gadget after you refresh. A few iOS programming updates aren't accessible remotely. VPN iPhone 8 intermediary associations may keep your gadget from reaching the iOS refresh servers.

    iPhone 8 User Guide
    iPhone 8 Manual

    iPhone 8 Manual, iPhone 8 Guide, iPhone 8 user guide, iPhone 8 Tutorial, iOS Guide. On the off chance that you are not incited to introduce new iPhone use another adaptation of iTunes, you as of now have the most recent form your working framework can bolster. A few components or gadgets may require a more up to date form of iTunes than your framework underpins.Get iPhone 8 setup guide or manual instruction. Download iPhone 8 user guide in PDF. iPhone 8 User Guide, Manual Tutorial.

    iOS iTunes 11

    See your gadget by tapping on the catch that demonstrates your gadget's name in the upper-right corner of the iTunes window. In case you're in the iTunes Store, tap the Library catch in the upper-right corner first. On the off chance that you don't see your gadget, select View > Hide Sidebar.

    In the event that you have numerous gadgets associated with your PC, tap the Devices catch, at that point pick your gadget from the menu.

    iMessage Bubble iPhone 8

    With iMessage iOS 11 applications, you can utilize applications with iMessage to work together with others, improve messages with stickers, share a tune, and more without leaving Messages.

    iMessage Bubble

    Send impacts

    Send an outline, tap, or even your pulse

    Utilize Digital Touch to send outlines, taps, or even heartbeats.

    Utilize emojis

    With several emojis to look over, which are presently three times their unique size, emojis breath life into your words with only a tap of your finger.

    iMessage Emojis

    Utilize message consequences for emojis iOS 11 with iMessage Buble on your iPhone, iPad, and iPod touch. You require iMessage to send message impacts. Contingent upon your transporter, informing rates may apply when you send SMS/MMS. On the off chance that you utilize iMessage and Wi-Fi is inaccessible, cell information rates may apply.

    iMessage impacts

    With iMessage Effects Words, you can utilize bubble impacts to change the way your message bubbles look. You can likewise utilize full-screen impacts to vivify the screen when you communicate something specific.

    iMessage Bubble Effects

    You can utilize iMessage bubble impacts to energize your message rises with various expressions. To communicate something specific with an air pocket impact, take after these iMessage Buble manual guideline in ventures beneath:

    On the off chance that you need replay a message impact, tap under the message. On the off chance that you can't get bubble impacts, check your Reduce Motion settings.

    iMessage full-screen impact

    With full-screen impacts, you can enliven your screen with inflatables, confetti, and that's only the tip of the iceberg.

    You can replay a message impact, tap the under the message. In the event that you can't get full-screen impacts, check your Reduce Motion settings.

    iMessage Expressions

    With Tapback, you can rapidly answer to messages with expressions, similar to a thumbs up or a heart.

    You can likewise utilize Tapback in gathering messages. To see who answered with a Tapback, tap it. You require iOS 11 to send and get Tapback messages.

    Written by hand iPhone 8

    You can customize your messages by including a note in your own penmanship. Your loved ones will see the message vivify, as though it were being composed before them. To send a manually written note, take after these iOS 11 direct

    Introduce iOS 11 to send and get an energized manually written message. On the off chance that you have imessage impacts not working iOS 10, you'll get a still picture.

    iMessage penmanship not working

    Attempt to refresh iPhone 8 the most recent iOS. You can refresh iPhone programming in Settings, or by utilizing iTunes. You can likewise reset iPhone 8, eradicate or reestablish iPhone, and after that utilization iCloud or iTunes to reestablish from a reinforcement.

    Update to iOS 13

    Upcoming iOS 14
    Share This:    Facebook Twitter Google+ Stumble Digg

    iPhone Guide to the Best iPhone Performance

    iPhone Guide
    iPhone Guide to the Best iPhone Performance - Apple is now offering iOS 13.3 to users as an over the air update. It includes bug fixes and the stability of your iPhone and iPad as well as specific fixes for Lightning headphones, crashes in Photos and with app extensions. Some users are already saying they will wait for iOS 14 to arrive before updating since later updates typically fix speed issues on some devices. Someone complaints about a slow iPhone and how you can try to fix slow iOS 13 performance without buying a new iPhone 11 or iPhone 11 Pro Max.

    iPhone Guide to the Best iPhone Performance

    Slow iPhone issues appear frequently after updates, partially due to the phone needing to re-index items, but also due to other upgrade challenges and out of date apps. Read here iOS Guide to get best iphone performance with improve yourself. If you're lacking an Apple ID, your iPhone experience will be very limited. While new iPhones usually help you set up your account, there could also be cases when you'd need to set it up from scratch, like when your phone isn't brand new. To get an Apple ID, you can just hit "Settings" on your iPhone and then tap "iCloud", iMore reported. There will be an option in there that says "Create a new Apple ID". Just follow the instructions and you're good to go. You can also use your PC or laptop to register for an Apple ID. This should be less confusing and a little more pleasant to the eyes. If you're a fan of using computers, you can just go to Apple's Apple ID signup page and register for an account in there. Once you're done, you can now start using your new Apple ID on your iPhone.

    Download the application that you need in the App Store

    App Store is a store applications are also books available for your iPhone, here you can find a variety of cool and interesting iOS applications that can be downloaded for free but some are paid. How to use the app on the iPhone is to install first, then on the home screen tap the application that you want running, the application will automatically open and running.

    You can download the application to your iOS device from the iTunes Store on your computer and then sync your device. Another way is directly on your iOS device using the App Store. Many interesting applications and placed at a bargain price even for free in the App Store also often inform some interesting and free apps on this page. Use the application you need and set it on your home screen to make it easier to look for when you want to use it because if not grouped will eat a lot of applications that are directly visible on the home screen. Congratulations to use iPhone yes.

    Turn Assistive Touch to protect the keys on your iPhone

    For all apple users, you would really need to do this and it is highly recommended that enable AssistiveTouch additional buttons colored bullet-bullet that can be pressed, adjusted its position as desired, and tools to perform activities of iPhone such as turning off your iPhone, take a screenshot of the screen, lock screen, a moment of sound, and other activities that require all buttons attached to the iPhone you.

    You can enable assistive touch this easily, in particular by:
    To Settings Menu -> General -> Accessibility -> AssistiveTouch
    Select ON to enable this feature.

    Change the EQ (equalizer) in the iPhone to Listen to Music with certain securities

    Make you enjoy to listen to music, sometimes we bored doing to the effect that normal wrote. In its iOS operating system Apple apparently there EQ feature to adjust the sound emitted from listening to music. Easy right way to use this iPhone.
    iPhone Guide to the Best iPhone Performance

    How to set EQ or Equalizer ie please go to:

    Settings -> Music -> EQ

    Choose different types of equalizer in accordance with your preferences

    Battery Saving iPhone Tips

    Try it checks each device iPhone you, we certainly do not think that hp upscale as the iPhone turned out to be a storage capacity of the battery is not great viewers, but the iPhone has made the battery doesn't drop fast as long as charge, make sure to at just 99% figure if it is not too, it is intended to extend the durable storage batteries in order to continue normal and is not reduced.

    How and Battery Saving Tips iPhone is as follows:
    Turning off Wi-Fi, Hotspot Tethering, Bluetooth.
    When you're at home turn off location (GPS) is also highly recommended, but if you want to leave the house should reactivate.
    Screen Brightness far
    brightness far in iPhone

    Turn on Airplane Mode
    If more guns are doing and want to turn off mobile data plan, you should enable airplane mode only. This mode actually for you if you're on an airplane, just a very powerful tool to save battery life turned out this way.

    Cover and Remove unused applications

    If you download an application that turns rarely used, it is better to erase application. How to delete apps on the iPhone by pressing and holding one application icon, it will automatically appear on the close button in addition to icon and logo application. Click the X button to remove the application on the iPhone. Easy right way to use the iPhone, is there a guide right here

    iOS Tutorial Classify Applications Per Category

    Hmm for tips on this one actually most optional means free for those of you want to do or not depends on the preferences and habits of users apple iPhone course. Grouping applications per category that make applications are listed in one file so easy to find.

    Is the same as deleting the application on the iPhone, only the difference do not click the close button [x] her, but hold the icon and crash into another application icon let me be one, then two of the icon will automatically merge into one. Try it slowly yes and continue to the application which is considered as the category, not the same game application at music application later fight.
    First, create a folder category.

    Utilize Auto Text feature in iPhone

    According to my own use of this feature could be considered important, because as we know the small iPhone screen when a finger is most certainly yaa dong complicated, especially if your nails are not cut. Complicated than writing the same thing over and over again, better to use iPhone Auto Text feature. The AutoText iPhone pointless to add text to an empty field such as during registration on the web page / online store, fill the delivery address when shopping online and many other things that require the same information about ourselves. The bottom line is, we make Auto Text (Shortcut) for our email, address, phone number, ZIP or anything else, just do not password heck.

    The iPhone trick is here :
    Go to the menu Settings - General - Keyboard - Shortcuts - click the + (plus)
    add auto text keyboard in iPhone
    adding the automatic word on keyboard ios

    iPhone Tutorial Turn on the alarm if necessary

    It is very mandatory and important especially for the guy like me whose work in front of his laptop late nights and continued the next morning went to college.
    Turning on the alarm is certainly very important for the often late getting up or going to bed in a state of just 1-hour and if your iPhone can be connected to speakers or speaker Home Theater mosque ya let you wake up.

    iPhone Guide to the Best iOS Performance
    Installing iOS 10, hope it doesn't slow down my iPhone 5s because lots of people said it could. We are also hearing about complaints from iPhone 5c, iPhone 5s and iPhone 6 owners who feel that iOS 10 slowed down their iPhone and trends show an increase in search for iPhone Best Performance Guide near each major release of new Apple software.
    iPhone Best Performance Guide

    When you start using a new version of iOS on your older iPhone it may suddenly seem much slower. In fast, it may be slower in some areas due to the challenge of running new software on an older device. Is Apple intentionally slowing down your old iPhone to make you upgrade to a new iPhone? There is no proof that the company is doing this, and it seems unlikely considering that users can simply choose not to install iOS 13.

    Instead of relying on crippling older phones, Apple adds in new iPhone 11 Pro Max specific features to iOS 13 and adds new features to the phone like water resistance, a new home button, and upgraded cameras.

    iOS 13 Performance

    In our time testing the iOS 13 update on the iPhone XR we didn’t run into slowdowns that some users complain about. We are in the process of testing iOS 13 on other Apple devices to see how it handles. There are iOS 13 problems, but slow performance isn’t one of the major complaints just yet. Watch the iOS 13 vs iOS 12.3.5 speed test video below showing the iPhone XR to see any speed differences. On an older device like the iPhone X or iPhone 8, there is often a greater chance of experiencing slow iPhone problems. Below you can see iOS 13 vs iOS 13.3 on the iPhone 11. It’s a good idea to check out the iPhone performance of your iPhone on iOS 13 before you update.

    How to fix Slow iPhone iOS 13 Performance
    Learn how to fix slow iPhone performance on iOS 13. This will work on your iPhone XR or your iPhone11, it doesn’t matter which iPhone you have, these three options allow you to improve slow iPhone performance after installing iOS 13.

    iPhone Guide Reset Settings

    The easy iPhone guide and solution to slow iPhone performance is to reset all settings on your iPhone. This will not delete your apps, data or music, but you will likely need to re-setup WiFi connections and you will need to customize your iPhone settings again.

    To start, go to Settings -> General -> Reset -> Reset All Settings -> Enter Your Passcode. Now, wait for the iPhone to restart.

    iPhone Guide to Reset Your iPhone

    The next level solution to completely reset your iPhone. If you are using an older iPhone and you have not ever started over from scratch since you bought it, this is a good time to try starting over. This will wipe all of your data from your iPhone and you will need to sync it back or to restore from a backup.

    Use these options to fix slow iPhone problems on iOS 13.
    If you restore from a backup you may bring some problems back, but it is the easiest way to get all of your data on to your iPhone again after a reset.

    Once you are done backing up, you can go to Settings -> General -> Reset -> Reset All Settings and Content -> Enter a Passcode.

    This will restart your iPhone and wipe it clean. This will take some time and you cannot use your iPhone while it happens.

    iPhone Tutorial Go Back to iOS 13

    You can still go back to iOS 13 for a limited time. This normally only lasts a week or more so if you are concerned, now is the time to go back to iOS 13. You can only go back to iOS 13.3.5, but you can go back and wait for iOS 13.0.1 or iOS 13.1.

    This is a list of what's new in iOS 13.1, including new features like Portrait mode on the iPhone XR Plus and a number of important fixes for the iPhone and iPad.

    Camera and Photos

    Introduces Portrait Camera for iPhone 11 Pro that creates a depth effect that keeps your subject sharp while creating a beautifully blurred background (beta)
    People names in the Photos app are saved in iCloud backups
    Improved the display of wide color gamut photos in the grid views of the Photos app
    Fixes an issue where opening the Camera app would show a blurred or flash screen for some users
    Fixes an issue that caused Photos to quit for some users when turning on iCloud Photo Library

    Maps

    Transit support for every major train, subway, ferry, and national bus line, as well as local bus systems for Tokyo, Osaka, and Nagoya
    Sign-based transit navigation including layouts of all underground structures and walkways that connect large transit stations
    Transit fare comparison when viewing alternative transit routes

    Messages
    New option to replay bubble and full-screen effects
    Messages effects can play with Reduce Motion enabled
    Fixes an issue that could lead to contact names appearing incorrectly in Messages
    Addresses an issue where Messages could open to a white screen
    Addresses an issue that could prevent the report junk option from displaying with unknown senders
    Fixes an issue where videos captured and sent in the Messages app could be missing audio

    Apple Watch

    Adds distance and average pace to workout summaries in the Activity app for outdoor wheelchair run pace and outdoor wheelchair walk pace
    Fixes issues that may have prevented Music playlists from syncing to Apple Watch
    Addresses an issue that was preventing invitations and data to appear in Activity Sharing
    Fixes an issue that was allowing Activity Sharing to update over cellular when manually disabled
    Resolves an issue that was causing some third-party apps to crash when inputting text

    iPhone Tutorial Improvements and Fixes Problems
    1. Improves Bluetooth connectivity with 3rd party accessories
    2. improves AirPlay Mirroring performance when waking a device from sleep
    3. Fixes an issue where playback would not work for iTunes purchased content when the "Show iTunes Purchases" setting is turned off
    4. Fixes an iOS 13 issue where certain selfie apps and face filters used with the FaceTime HD Camera on iPhone 11 and iPhone 11 Pro Max did not display a live preview
    5. Fixes an issue in Health where individual strokes are converted to separate characters when using the Chinese handwriting keyboard
    6. Improves performance of sharing websites from Safari to Messages
    7. Fixes an issue in Safari that caused web previews in tab view to not display correctly
    8. Fixes an issue that caused certain Mail messages to be reformatted with very small text
    9. Fixes an issue that caused some HTML email to be formatted incorrectly
    10. Fixes an issue that in some cases caused the search field to disappear in Mail
    11. Fixes an issue that could prevent Today View Widgets from updating when launched
    12. Fixes an issue where Weather widget sometimes failed to load data
    13. Fixes an issue on iPhone 11 Pro Max where Home Button click settings would not appear in search results
    14. Fixes an issue that prevented spam alert extensions from blocking calls
    15. Resolves an issue that could prevent alarm sounds from going off
    16. Fixes an issue where audio playback via Bluetooth would cause the Taptic engine to stop providing feedback for some users
    17. Resolves an issue preventing some users from restoring from iCloud Backup
    For information iPhone Guide to the Best iPhone Performance on the security content of Apple software updates, please visit this website: https://support.apple.com/
    Share This:    Facebook Twitter Google+ Stumble Digg

    iPhone Guide - iOS 10 Ultimate Guide

    iPhone Guide - iOS 10 Ultimate Guide - iOS (formerly iPhone OS) is a mobile operating system created and developed by Apple Inc. exclusively for its hardware. It is the iOS 10 Guide wich operating system that presently powers many of the company's mobile devices, including the iPhone, iPad, and iPod touch. It is the second most popular mobile operating system globally after Android by sales. iPad tablets are also the second most popular, by sales, against Android since 2013, when Android tablet sales increased by 127%. Now Apple has just released the iOS 10.0.3 for iPhone 7 and iPhone 7 Plus. So, what is included in the iOS 10.0.3 update?

    iPhone Guide - iOS 10 Ultimate Guide

    Here iOS Ultimate Guide brings some bugs fix including bugs related to cellular connectivity issues. Apple states that the iOS update fixes bugs including an issue where some users could temporarily lose cellular connectivity. A few weeks ago, some users reported LTE connection issue on their iPhone 7 and 7 Plus, especially for Verizon and AT&T subscribers. So, if you are one of them, you should update to iOS 10.0.3.The iOS 10.0.3 update is focused on fixing the cellular connectivity issues on iPhone 7 and iPhone 7 Plus so older iPhone series won’t get the update. Get the Apple security Update here.
    1. Updating to iOS 10.0.3
    2. Updating to iOS 10.0.3
    3. Updating to iOS 10.0.3
    4. Updating to iOS 11
    5. Update to iOS 12
    6. Update to iOS 13
    Read this before updating to iOS 10.0.3, make sure to backup of your device using iCloud or iTunes. You can update your iPhone 7/7 Plus wirelessly or by using iTunes. If you receive a message says that an update is available, tap Install Now. Here’s other steps iOS 10 Ultimate Guide you can take:
    1. Plug your iPhone 7/7Plus into a power source
    2. Connect to Wi-Fi
    3. Tap Settings > General > Software Update
    4. Tap Download and Install.
    5. During this step, you may receive a message asking to temporarily remove apps. You should tap Continue or Cancel. There’s no need to worry about the removed apps as iOS will reinstall the apps later.
    6. Next, tap Install.
    7. You can also choose tap Later and choose Install Tonight or Remind Me Later.
    8. Enter your passcode.
    You can also update your iPhone 7/7 Plus to iOS 10.0.3 via iTunes. Here’s iOS 10 Ultimate Guide to update :
    1. Connect your iPhone 7 to your computer.
    2. Install the latest version of iTunes on your computer. Get the latest version of iTunes here.
    3. Launch iTunes
    4. Select iPhone
    5. Click Summary
    6. Click Check for Update
    7. Now click Download and Update
    8. Enter your passcode
    If you are not particularly tech savvy, the new features and additions in iOS 10 might be a bit too overwhelming or you might not be able to figure out how to use a particular feature. To help you with this, we have compiled all the new features that Apple has introduced in iOS 10 below along with relevant how-tos on how to use them.

    iPhone Guide iMessages

    The new iMessages app in iOS 10 packs in plenty of new features to help bring your conversations to life. This includes a dedicated app store, sticker support, attachments, and more.

    iMessage now has its own App Store where you can download stickers, GIFs, and more. To get you started though, Apple already includes four set of sticker packs in iOS 10 update.

    You know how you can send a Like in the Facebook Messenger and how you can react to status updates in Facebook with different emoticons? This lets us quickly acknowledge that we’ve read the message and even show how the message makes us feel, very quickly, without even typing anything. The new Tap back feature in the Messages app of iOS 10 lets you do just that.

    iOS 10 Ultimate Guide Bigger Emoji

    Among the most innovative features in the new iMessages app in iOS 10 is the ability to send bigger emoji. And even better, you can replace words with Emoji in the Messages app easily.

    iPhone Guide Digital Touch

    It means is that for a second or two, your iPhone’s screen becomes your canvas. And whatever you doodle/write on it is send to the conversation, with an animation of exactly how you drew it. It’s pretty cool. You can do it on photos and videos as well.

    Manage Attachments iOS 10 Ultimate Guide

    iMessage in iOS 10 is making it easier to manage attachments that you send or receive. By managing your iMessage attachments smartly, you can keep your iPhone free from clutter.

    Effects iOS 10 Ultimate Guide

    iOS 10 Guide, There’s no escaping it. The new bubble and full-screen effects in the Messages app in iOS 10 are loud. Colorful, and loud. If you are unsure on how to use Effects in iMessage, check our how-to below. And if your brain is annoyed by so many colors or sudden movement from the effects, we have a solution for that as well.

    iOS 10 Send GIFs Guide

    Did you know that you can now send GIFs in iOS 10? And you don’t have to manually hunt for a relevant GIF as well. It's all inbuilt.

    Invisible Ink: Ever wanted to send some a secret message? Like in those movies. The message would only be revealed when they put it under this certain light. Well, you can do a version of it in the Messages app in iOS 10. It’s called Invisible Ink.

    iPhone Guide Markup images

    You can finally markup images in iMessage in iOS 10. Yes, drawing dog ears on your friend’s graduation photo and sharing it in a group chat just got infinitely easier.

    iPhone Guide Quickly Send selfies

    You know what’s better than sending an emoji, a bit emoji, or a GIF reaction? Sending a picture of your actual facial reaction to the message you just got. Call me old fashioned, but it just has its own charm. If you think so as well, the new Messages app in iOS 10 just made this a lot easier to do.

    App Store iOS 10 Ultimate Guide

    iMessage in iOS 10 comes with its own App Store that features a variety of apps, games, and stickers.

    Music iOS 10

    The Music app has received a huge overhaul in iOS 10 that makes using Apple Music simpler to use. The bold redesign means that you might have to make yourself familiar with basic features of the app once again.

    Wondering iPhone guide how to shuffle songs from your library, from an album or from the Now Playing view?

    Play Later

    The iOS 10 Music app redesign, while much of an improvement, has left many eyebrows raised. From hiding the Up Next queue in a place no one can figure out, to the removal of star ratings and the “Add to Up Next” queue.

    iOS 10 Ultimate Guide Download and manage music

    The redesigned Apple Music app in iOS 10 is making it easier to manage your music library and download new songs from Apple Music. It also makes it easier to differentiate between songs downloaded to your device and the ones that are available for streaming.

    Optimise storage

    If you own a 16GB iPhone, storing music on it can be a particularly tough task to manage since you are likely going to run out of space sooner than later. To ease your pain, Apple includes a handy new Optimise storage feature in Apple Music in iOS 10 to make managing space on your handset easier.

    Lyrics

    The updated Music app in iOS 10 now features built-in support for showing lyrics so you can sing along to your favourite songs easily.

    Shuffle

    The Music app in iOS 10 has received a big, bold redesign. And some feature placement has been shuffled a bit. Including the Shuffle feature. Don’t worry it’s all there (it’s not iOS 8.4 all over again).

    Photos iOS 10

    Besides iMessage, the Photos app has also seen a major upgrade in its functionality in iOS 10. It borrows heavily from Google’s Photos app, with the only difference being that it manages to achieve all the features without having to upload your photos to cloud i.e. all the processing is done right on the device itself.

    Searchable objects

    The smarter new Photos app is capable of searching for people, objects, and texts and more in your photos. This might seem like a trivial feature, but it definitely comes in handy every once in a while. Think how easily you can pull up all the photos of a particular friend or family member by simply searching for their name in the Photos app. Cool, ain’t it?

    iPhone Guide Memories

    There is a new Memories tab in the Photos app of iOS 10 that stores Memories. Here you’ll find albums of sorts – Memories – generated periodically by the app itself, based on certain context. It can be a time, place, people you were with, or all of the above. The best way to explain it is when you come back from your next weekend trip, you’re sure to find a “Memory” for that location inside the Memories tab.

    MailNew features iOS 10 Ultimate Guide

    The Mail app in iOS 10 remains largely the same as before, but it does come with some major new features to help make managing your inbox easier.

    Easily unsubscribe from Newsletters

    The updated Mail app also makes it easier to unsubscribe from Newsletters

    Quick reply from lock screen

    The Lock screen in iOS 10 has received a major revamp and now comes with features like raised to wake. It now also provides you with quick access to widgets and lets one quickly reply to messages without having to open the app.

    Quickly call favorite contacts

    Thanks to quick access to widgets, you can also quickly make calls to your favourite contacts without having to unlock the phone.

    Disable Press to Unlock

    The second generation Touch ID sensor on the iPhone 6s and iPad Pro is so fast that users were flying through the lock screen. Thus, whilst revamping the lock screen for iOS 10, Apple has changed the unlocking behavior for iOS as well. Instead of simply keeping your finger on the Touch ID sensor, one has to press the button to unlock their device now. This is already causing confusion for new users. And people are worried that such a frequent use might wear out their home buttons. I personally think that we’ll all get used to it in a while.

    Disable Lock screen widgets

    Don’t like widgets on the lock screen? You can always disable them.

    Others iOS 10 Ultimate Guide

    The Notes app in iOS 10 has received some major new collaboration features and some basic new additions like checklists.

    View Voicemail Transcripts

    With iOS 10, Apple has introduced a new transcription feature for voicemail that automatically transcripts your unread voicemails.

    Finding Your Parked Car Location

    iOS 10 is all about getting a little bit smarter and making small annoyances a thing of the past. One of those delightful little features in the Maps app is the ability to automatically find your parked car. Now, when you leave your car (as long as it’s not at your home address), iOS 10 will remember the location.

    Clear all notifications

    Apple has finally added the option to clear all notifications for all 3D Touch capable devices in iOS 10.

    New widgets: Widgets in iOS 10 are finally getting the attention they deserve. Almost all the widgets in the stock app have been upgraded to make them more useful.

    Remove stock apps

    No longer will you have to create a folder called “Extras”, put in all the unused stock apps and drag it over the last Home screen. For Apple has finally, finally added a feature in iOS 10 that lets you delete all the stock apps.

    Wake Alarm in Clock

    iOS 10 brought a lot of little things. One of these features was tucked under the new “Bedtime” tab in the redesigned Clock app (that dark mode looks amazing though). Wake Alarm feature is simple. Basically, you tell the Clock app what time you usually wake up, how much time you’d like to sleep and the app will take care of the rest.

    Screen Filters

    iOS has always been the leader in terms of accessibility features, and with iOS 10 Apple is making things even better by introducing Color Filters to help people with color blindness.

    Home App

    Home is an entirely new app iOS 10, that’s supposed to be the only app you’ll ever need for controlling all the smart home (iOS HomeKit) devices that you own. Once you’ve setup the particular devices using their own apps and pairing systems, you’ll see them in the Home app.
    Share This:    Facebook Twitter Google+ Stumble Digg

    iPhone Guide - How to Make Apple ID Without a Credit Card

    iPhone Guide - How to Make Apple ID Without a Credit Card - Apple ID is a special account that is used for any iOS devices, to be able to enjoy the service from Apple such as the App Store, iBooks Store, and iTunes Store, in addition, must have iOS device itself, users must have an account that often we call the Apple ID. As well as the function of your Gmail account in Android, Apple ID is useful for accessing the service from Apple, such as downloading apps in the App Store, buying songs at the iTunes Store, buy books in the iBooks Store, store photos in iCloud, iMessage and use other services.

    How to create an Apple ID even bother easy, in some conditions to make the Apple iPhone user ID or other iOS devices such as iPad, Macbook or iMac must include the payment method, it can be by credit card or iTunes Gift Card.

    iPhone Guide - How to Make Apple ID Without a Credit Card

    Usually, for the iPhone or the new iOS devices will be provided three times manufacture Apple ID for free can without including any payment method and the rest to make Apple ID users must specify a payment method. The methods of payment to make Apple ID can be from a credit card or iTunes gift card, using a credit card will certainly become a difficult problem because not all users have credit cards, other alternatives you can choose the payment method via iTune Gift Card that you can buy at agent -Agen iTune Gift Card.

    However, if the above alternatives nor can you use let's try the alternative that I call the method "Luck", why is that, because with this method not everyone is fortunate to be able to make Apple ID without including the payment method.

    Many of the problems that often arise when creating Apple ID among None option for the payment method does not appear, the second time None option appears but stopped on message "for assistance, contact iTunes Support it is a common occurrence.

    Well for that pray first before making Apple ID with the method of this luck, because Apple did not give to create Apple ID must include the legitimate payment method is way we just did. Okay, we direct the following iPhone guide how to create Apple ID without a credit card or iTunes Gift Card.

    In this iPhone tutorial we will use two methods to make Apple ID without using a credit card first through second iPhone Apple's website, let's look at step-stride.

    1. How to Make Apple ID Without a Credit Card Using an iPhone, iPad, and iPod Touch
    The initial stage to prepare beforehand the tools ie iPhone, email, and the internet, could free email from Google mail or Yahoo mail.

    1). In this iPhone Guide We use the iPhone 11 Pro Max with iOS 13.
    2). Make sure the iOS devices that do not have an Apple ID to sign in, if it still sign-in please you sign out first.
    3). Open the App Store, iTunes Store, or iBooks Store on your iOS device.
    4). Select an app, song, video, or book that you can get for free (unpaid) of the mark in the absence of a price tag on its download button.
    How to Make Apple ID Without a Credit Card
    5). Tap the "GET" or "GET" next to the item, and press it again to "INSTALL".
    In this step window will pop-up with a list of options to sign in, "Use Existing Apple Id", "Create New Apple ID" and "Cancel".
    6). Then select "Create New Apple ID" or "Create New Apple ID".
    7). Next will appear the Terms of Services Agreement. just select "Agree". Then will reappear confirmation pop-up window, you just select "Agree".
    8). After that, you will be taken on the form data itself, there fill out the form with valid data, including three security questions please fill in the correct and do not forget, three security questions that will be useful if you forget the password:
    • Email: fill in your email is valid.
    • Password: fill in your password, the conditions and provisions must be at least 8 characters, there should be numbers, uppercase, lowercase and there should be no letters or numbers or special characters in a row along the twin 3 times
    • Verify: fill exactly the same as the password
    • Security Info: contents of this security question eg childhood cartoon?
    • Answer: The question of the answer eg: pokemon
    • Day: Date of birth
    • Month: Month of birth
    • Year: Year of birth (the year in which the content when creating Apple ID is your age over 18 years).
    • Subscribe: OFF, sorry no need spam
    • Subscribe: OFF,
    • After all the forms completed filled press Next
    9). Follow the instructions on the screen. This is where the determination of his lucky if Option None or No appear on the method of payment or billing information. If the option None or Nothing appeared just let me check the in situ.

    10). After entering all the required information press next, Done. You will be sent a verification email and it was a sign Apple ID Apple ID you successfully created. Go to your email and then verify that the next Apple ID Apple ID you can start to use.

    11). Done. You make Apple ID Without a Credit Card.

    2. How to Make Apple ID Without a Credit Card Through Website
    If luck in the first step is not possible to make you get the Apple ID through the website of the luck you can get. For you who are still constrained when creating Apple ID in the first method, try the second method via the website, the following steps:
    Apple iPhone Guide

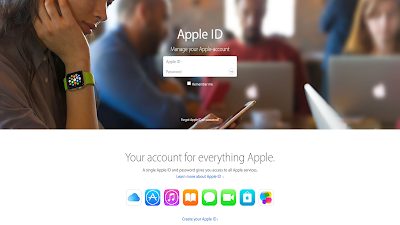
    1). First, open appleid.apple.com
    2). In the top right menu click on the button "Create Apple ID" or "Creat Apple ID"
    3). Then you will be directed to a new page that contains the form data themselves, well content with the complete form with your personal data, similar as in the first method possible.
    [Note] At the time of filling the password, the password must use at least 8 characters, at least 1 uppercase and one lowercase.
    4). If all the forms have been filled click the "Continue" button located at the bottom of the page.
    5). When finished waiting for the confirmation email from Apple, if it has no direct please make confirmation.
    6). Done. You successfully make Apple ID Without a Credit Card

    In the above, you do not need to include your billing information Credit Card, Gift Card or Option None / No.

    The billing information will be asked when you want to use the Apple ID to download the application or the other, for it continues in the next iPhone guide and tutorial that you can access through a link on the App in the App Store. If the above steps successfully, congratulations you've got a new Apple ID and ready for use to enjoy the service of Apple. Similarly, from iPhone Guide - How to Make Apple ID Without a Credit Card may be useful.

    Share This:    Facebook Twitter Google+ Stumble Digg

    iPhone Guide - How to use the iPhone

    iPhone Guide - How to use the iPhone - To you who just got an iPhone or have long used the iPhone, very precise you read the article entitled how to use the iPhone to all Apple users shifting from one phone OS to another is quite an annoying thing to do, which is probably why most people try to stick to one OS for as long as possible. We will discuss matters what must be done for the gadgets to optimize and use features on your iPhone for more leverage. Read the iPhone User Guide first. You can read iPhone guide online using iBook or download iPhone User Guide PDF. The tips that we provide is very suitable for those of you who have recently iPhone and do not know what to do anything. However, there might come a time when you'd need to change your phone and use a different operating system.

    iPhone Guide - How to use the iPhone

    iPhone GuideGetting Started With Your iPhone Manual here for iPhone guide for seniors and beginners. A user guide or user's guide, also commonly known as a manual, is a technical communication document intended to give assistance to people using a particular system. It is usually written by a technical writer, although user guides are written by programmers, product or project managers, or other technical staff, particularly in smaller companies. User guides are most commonly associated with electronic goods, computer hardware and software.
    Most user guides contain both a written guide and the associated images. In the case of computer applications, it is usual to include screenshots of the human-machine interface(s), and hardware manuals often include clear, simplified diagrams. The language used is matched to the intended audience, kept to a minimum or explained thoroughly. Not only for beginners or those who are just starting to wear iPhone, but for all users of Apple devices that already has too can learn together in a dish tips through this article for actually using the iPhone is not difficult and easier than using other operating systems such as Android or Windows Phone. When you first turn on your Apple iPhone, the device will guide you in setting up the basics so please read the iPhone manual guide.

    As of September 2016, 15 different iPhone models were produced. The models in bold are the current flagship devices of the iPhone series:
    1. iPhone (2007–2008)
    2. iPhone 3G (2008–2010)
    3. iPhone 3GS (2009–2012)
    4. iPhone 4 (2010–2013)
    5. iPhone 4S (2011–2014)
    6. iPhone 5 (2012–2013)
    7. iPhone 5C (2013–2015)
    8. iPhone 5S (2013–2016)
    9. iPhone 6 (2014–2016)
    10. iPhone 6 Plus (2014–2016)
    11. iPhone 6S (2015–present)
    12. iPhone 6S Plus (2015–present)
    13. iPhone SE (2016–present)
    14. iPhone 7 (2016–present)
    15. iPhone 7 Plus (2016–present)
    16. iPhone 8 (September 22, 2017)
    17. iPhone 9 (rumors)
    18. iPhone 10 (November 3, 2017)
    19. iPhone X (November 3, 2017)
    20. iPhone 11 (September 20, 2019)
    21. iPhone 11 Pro (September 20, 2019)
    22. iPhone 11 Pro Max (September 20, 2019)
    Once you're done with it, you're free to play with your phone a little to get a grip on how it works. One of the first things you can do is find the "App Store" app on your screen so you can download your favorite apps. The best way to get used to your new phone is to start getting used to your favorite app in there. Let's prepare you to read the iPhone Guide and tips on how to use iPhone below. The things you must do after buying the Latest iPhone by read this iPhone Guide :

    1. Setting Initial Setup iPhone
    The initial step in this phase is to first turn on your iPhone mobile phone and then do the following initial settings.
    iPhone Guide - How to use the iPhone

    - Once the iPhone is on and activated by pressing the power button that is on the right side near the thumb position, you will see a popup display "Home" or Warm Welcome from Apple.

    - Swipe from left to right to start the process of setting up the next will turn up.

    - Furthermore, will appear in the language selection screen settings of your iPhone . Choose a suitable language and you want to use. This will set the default language as a whole.

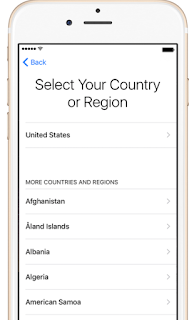
    - The next phase, you will be prompted to select from a list of countries and regions listed.

    - You are also prompted to select a network Wi-fi (Wireless) is available near your location is located.

    - Then select the wifi network, and enter your Wi-fi password.

    Apple recommends that you regularly update iOS the latest iOS operating system as well as a way to store your personal information and is used to download a variety of applications in the Apple Store (AppStore) when it has registered apple id.

    - Then select "Enable Location Services" if you want to enable Location Services on your iPhone device. Service Location Service will be helpful if your iPhone is lost or difficult to search for and find it, then the GPS will send data location of your iPhone in the feature "Find My Phone" to enable location iPhone services.

    - The next step is to register yourself to use the iPhone.

    Set Up iPhone with iPhone guide : Select this option if you are really new to iPhone and yet have Apple ID. (Recommended is also important)

    Restore from iCloud Backup: If you already have an Apple ID and registered as an Apple user you can restore the files stored in the iCloud.

    Restore from iTunes Backup: If you already have an apple id and want to restore a variety of applications, music, and settings are saved simply choose iTunes Backup.

    Up here you have successfully set up your iPhone and setup the initial settings of your Apple iPhone devices.

    - Continue to the next stage which you will be asked to sign in with your Apple ID or create an Apple ID Guide. If you already have an Apple ID, select sign in with your Apple ID then create and sign in Apple ID.

    - Then you will be prompted to accept the Terms and Conditions. Press the Agree button at the bottom right corner of the screen. You will be re-prompted to agree with a popup asking you to agree to the Terms and Conditions. Tap on Agree the terms and conditions made Apple ID and to continue.

    - Click or Press "Agree", then wait for the process that takes place when you set up your apple id and it will probably take a few minutes. Fill your data correctly.

    - You will get the option to use iCloud service or not. iCloud lets you access your photos, calendars, music, contacts and some other settings on your iOS devices automatically. We recommend and guide you select "Use iCloud".

    - Furthermore, companions will be required to use or Do not Use Find My iPhone. Find My iPhone is a free service that allows you to search, lock, and delete your iPhone if you lose it one day. With iOS 10 and up, Find My iPhone also includes Activation Lock, so that a person will require Apple ID and password to delete or activate your iPhone. We would recommend you to use Find my iPhone, so press the "Use Find My iPhone".
    iPhone Guide - How to use the iPhone

    - Next, you will be asked to enter data in an email address, phone number and address which can be used to contact or help you with iMessage service facilities.

    - Then the next step is to set the Touch ID, which activates the fingerprint sensor is used as a key when the iPhone screen and iPhone dead in a locked state. So use your fingerprint to unlock it.

    - Save / Tap "Set Up Now" to set up touch id iPhone and retrieve data about your fingerprints. You will be asked to put your thumb on the Home button to Set Up Fingerprints. To add fingerprints in iPhone, Position your thumb with vertically straight up to your fingerprints were taken. This process is performed approximately 3x retrieval, so you put the thumb in accordance with the same position repeatedly until the fingerprint data entry means the value is 100% accurate.

    - Click Continue to finish.

    - Then the next step is you will be prompted to enter a 4-digit passcode and then re-enter the new code you enter. Please note your code, it is important if one day you forget.

    - Step activate iPhone lastly, you will be prompted to choose to use or not to use Siri. Siri is Apple's intelligent facilities where you can chat and ask about anything you need such as sending SMS, call someone, ask something then find by Siri Guide here through a browser and a variety of other things, Siri will automatically answer it. Only for the moment, Siri service facilities can only communicate in English, so everything you say must be in English in a clear voice, loud, and proper pronunciation.

    - We recommend to activating Siri by selecting "Use Siri".

    - Next, comes the choice of return is "Automatically Send" if you want to send diagnostic and usage data to Apple. If not, press the option "Do not Send". Select only do not send.

    - You have successfully completed the initial setup process on iPhone and greeted with Welcome.

    2. Install Latest iTunes version on Computer

    Apple makes iTunes application not only as a music player application, and shopping at the iTunes store but if you're using an iOS device such as iPhone or iPad, iTunes is useful for organizing files on iPhone in full. iTunes is used to move files from computer to iPhone to do a backup of the computer, add and delete songs, videos, photos, apps, and many other things. Actually, these steps to install iTunes you can do it later, such as the iPhone you buy in a store and want to immediately active, please skip this step and towards other points. You can download iTunes on Apple's page.

    3. Make Apple ID

    In the first step, we might have made apple ID, but the apple id that we made have not been fully active for the apple id need information about payment options such as Credit Card legitimate. If you do not have a credit card or not using a credit card then consider the following iPhone tips:

    How to Make Apple ID without a Credit Card:

    1. Open iTunes store on your computer or notebook.
    2. Log in to use your Apple ID that you created in the beginning.
    3. Search for music or apps for free on the iTunes page.
    4. Download the application, then you will be redirected to the payment page after login apple id.
    5. There is a large selection of "None" on the payment option available.
    6. If there is no selection of "None" please you log out, and search for the app free return. Then please download and register new Apple ID.
    7. Fill in the correct data such as full name and address.
    8. At the payment, then the option "None".
    9. how to make Apple ID without a credit card
    How to Make Apple ID without a Credit Card

    When finished, please save your Apple ID and activate your iPhone then log in using the Apple ID.

    Use these accounts to log in the iPhone application menu Settings - iTunes -> App Store and do not forget, before doing so, make sure the iPhone connected to the Internet. Then log in via the Settings menu iCloud - iCloud using the same email with the Apple ID earlier.

    Once completed, you'll get a notification in the form of messages in your incoming email account your Apple ID. With apple id account active data complete payment is made you can browse the iTunes Store or the Apple Store to download a variety of music or a free iPhone app also like BBM, Line, Kakao talk, Snap Chat, Paypal, Instagram, and others.

    Downloading Your Favorite Apps - iPhone Guide
    Most of the time, you'd know how your favorite app works no matter what phone you're using. Whether it's Twitter, Facebook or Instagram, starting with an app that you know by heart will do the trick for you. To install your desired app, find the blue "App Store" icon and open it. After which, hit that magnifying glass icon at the bottom that says "search". Then, type out the name of the app you'd want to download and then tap "search" from the keyboard

    Once you see the search results, find your app and hit "Get". After which, you'll be required to login with your Apple ID and password. Once you put in your login details, the app will start to download on your home screen and once it's done, you'd be free to use it. You can always delete your apps if you no longer need them. Just long press the app icon and hit the "x" mark from one of its corners. Take note that Apple's native apps cannot be deleted.
    Notifications Settings
    Keep in mind that every time a new app is downloaded, the app will prompt you with a question of whether or not you'd want that certain app to give you notifications. It's a simple yes or no question that can help you set your notification settings right there and then. If you change your mind or if you want to get deeper into the notification settings, you can always go to your phone's "Settings" and find the "Notification" tab. From there, you'll see a complete list of your apps and taps on their names will open their settings page. You can choose whether or not you'd want their notifications visible and you can also decide whether or not you'd want to turn on their banners, alerts, and lock screen thumbnails.

    iPhone Guide Make Use Of The Control Center
    The iPhone's control center allows you to get an easy access to the most important options in your phone. The control center is easily accessed by swiping from the bottom to the top. From there, you can enable and disable multiple options like Wi-Fi, Airplane Mode, Bluetooth, Do-Not-Disturb mode and Auto-rotation. The flashlight, clock, calculator and camera are also in there. What's great about this is that you can access this part even if your phone is locked. It's a pretty sweet feature for people who always use the flashlight and calculator. However, if you don't want your friends to prank your camera while the phone is locked, you can always turn the control center off. Just go to "Settings" and find the "Control Center" tab. Needless to say, turning it on adds a touch of convenience to your everyday life, especially for the fact that the brightness settings are also easily accessed from there.

    Cleaning Up Your iPhone's Screen
    If you don't like how your app icons are showing up on your screen, you can always move them around. When you long press one of your apps from the screen, the icons will start vibrating and showing an "x" mark on their corners. At this point you can delete the app by hitting "x" or you can drag them to your desired location. You can relocate the app to the next screen by dragging it to the right and you can also gather apps together in one folder by dragging one app to another app.

    General Tips And Tricks - iPhone Guide
    If you want to change any of your iPhone's settings, you can always do this by visiting the "Settings" page. iOS' settings tab is pretty easy to use. You just need to be extra patient. If there is an app that you're trying to search for on your phone, you can always use the search bar. Just swipe to the left side of your home screen and you'll find the search bar in there. You can also find it by swiping down from the home screen. The search bar is usually pretty helpful, not just in finding your lost app but also in using the web to search for your query. As a whole, the iOS system is not that hard to use. If you have patience and time, you'll master the system in no time. Just do your best not to throw your phone away when you get frustrated over it. Most of the time, a simple googling does the trick. It's also worth mentioning that the same tips above are also applicable to the iPads.

    iPhone Guide If you can not activate the iPhone
    If you see a warning message when trying to activate your iPhone, follow the steps below.

    When trying to activate your iPhone, you may see a message that could not be activated because the iPhone activation server is not available, the SIM card is not supported, or the activation could not be completed. Follow the steps below.

    Before you begin to activate your iPhone
    • If your iPhone uses a SIM card, make sure the card is inserted into the iPhone. Although no active contracts, iPhone may still need a SIM card to be enabled.
    • If there are errors No SIM, follow the steps below. Warning No SIM or Invalid SIM will appear when the SIM card is damaged, locked, or no.
    • If a message appears asking to sign in with your Apple ID to activate, learn about the Activation Key.

    Follow the iPhone Guide and steps below
    1. Find friends on system status page. If the box next to iOS Device Activation is not green, try turning iPhone later.
    2. If prompted, enter your password. Request password means Activation Key may have been activated in the Find My iPhone.
    3. Restart your iPhone.
    4. If you are using a mobile data connection, try connecting to the Wi-Fi network that reliably. If the Wi-Fi connection does not work, try connecting to iTunes.
    5. If you use iTunes to activate the iPhone, make sure iTunes has been updated to the latest version.
    Until we see you here in the iPhone guide article How to Use the iPhone to all Apple users, which might help you for a new one using the iPhone or even just bought. It be useful and safely use the iPhone. Stay tuned for more information on here, please feel free to share this article with your friends on the share button at the top can with facebook, twitter, etc.
    Share This:    Facebook Twitter Google+ Stumble Digg